Explore these easy-to-build DIY Broom Holder Ideas to keep your home cleaning tools neatly arranged and easily accessible!
Are you struggling to keep your brooms organized in the cleaning closet? Don’t fret! Check out these ingenious broom holder ideas to keep your cleaning tools in order outside the closet.
DIY Broom Holder Ideas
1. DIY Garage Pegboard Broom Organizer
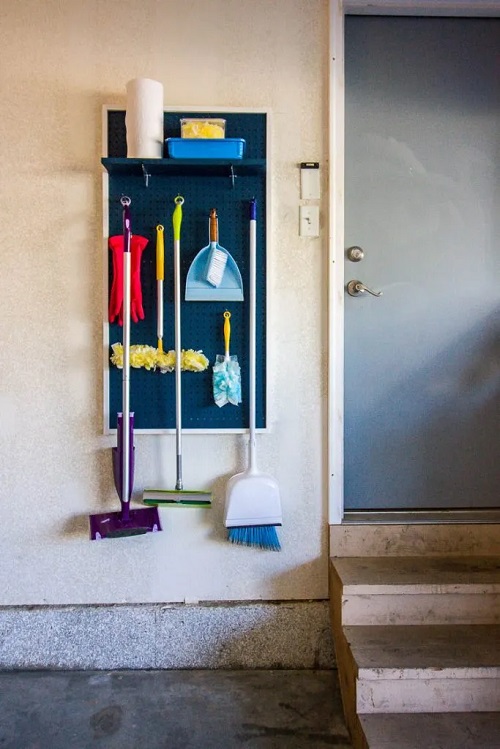
You only need a basic sheet of pegboard to create a frugal mop and broom organizer. This holder is the best option for apartments with limited floor space.
2. Rustic Industrial Broom Holder Idea
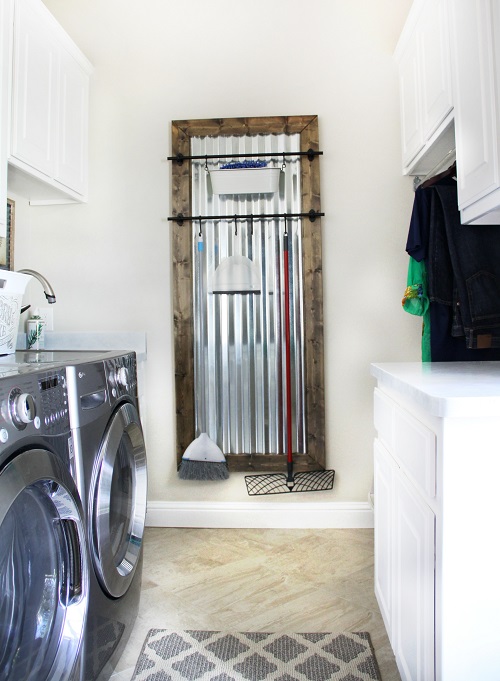
This industrial broom holder is made from wood, corrugated sheet, screws, drill, and rails. It not only keeps the brooms and mops in order but also complements the farmhouse-themed home decor.
3. Easy DIY Mop and Broom Storage
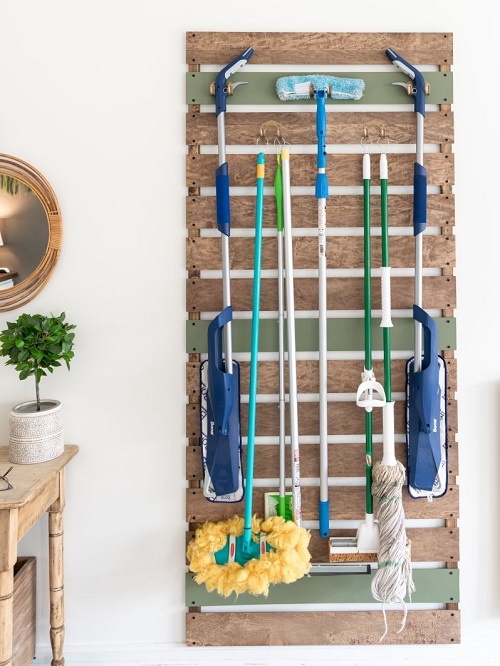
Show off your woodworking talent by assembling this wall-mounted vertical wooden mop and broom storage rack. It’s made up of two 1×2 furring strips, wood stain, laser level, plywood, and table saw.
4. DIY PVC Broom Holder
Want an economical broom organizing solution in your garage? Look no further than this easy-to-make PVC pipe broom holder. Watch this video tutorial for the building instructions.
5. Broom and Other Cleaning Tools Holder Idea
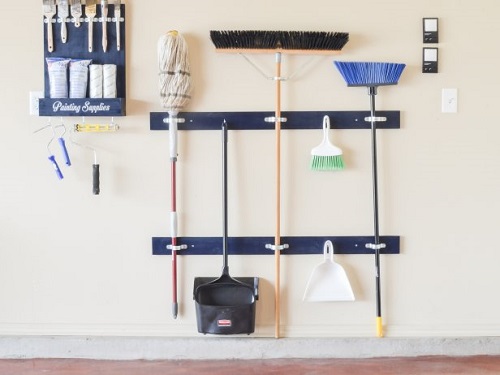
Keep brooms, mops, and other large cleaning tools neatly organized in your garage or basement with this custom holding station. Anyone with basic woodworking skills can easily make one at home.
6. Maple Broom Holder Idea
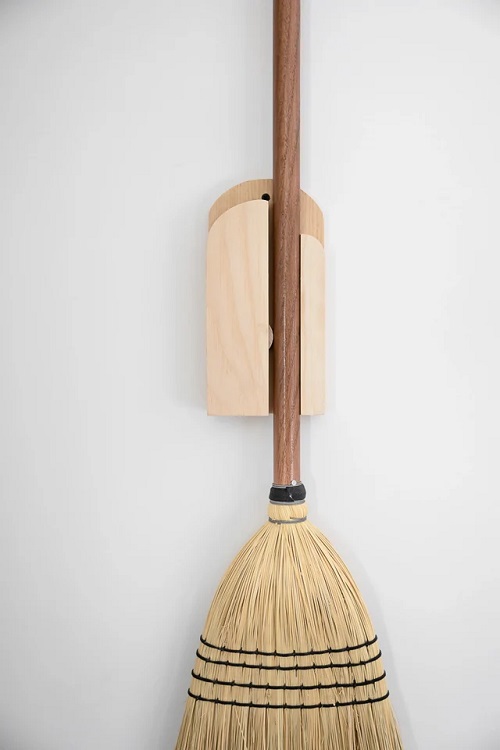
Handmade from maple wood, this broom holder looks visually appealing and keeps the broom at arm’s reach for easy sweeping. You can also use it to display a decorative one.
7. DIY Custom Broom Holder
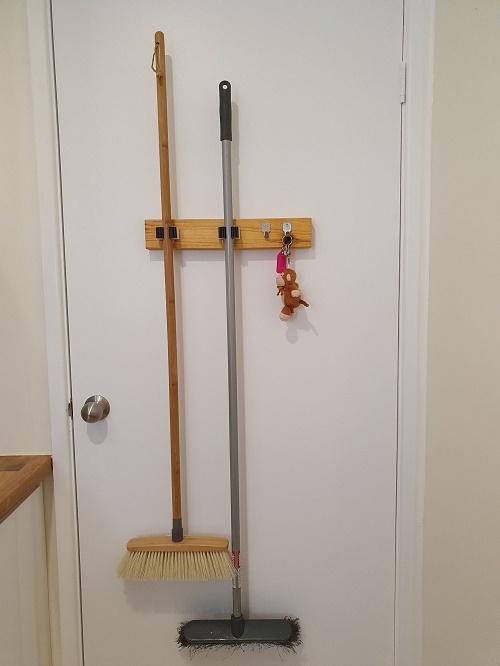
This broom holder easily installs to the back of a garage door so that you can keep cleaning supplies neat and out of sight. Find the list of supplies and step-by-step instructions in this blog post.